Connect a custom domain with Notion Sites
If you already have a custom domain, you can use it with Notion Sites. Learn how to do this, both in Notion and in your DNS provider 🔧

Note: This feature is only available on paid plans.
Workspace owners on paid plans can connect their existing custom domains with Notion Sites by purchasing the custom domain add-on. Notion doesn’t sell custom domains or replace your current domain provider — the add-on allows you to use Notion Sites with a custom domain you already own.
Once a workspace owner on a paid plan connects a custom domain with Sites, they'll be charged an additional $10 per month. Note that with annual billing, you’ll unlock a discounted rate for the custom domain add-on of an additional $8 per month.
For each custom domain you want to use with Notion Sites, you’ll have to purchase a separate custom domain add-on. You can do this for up to 25 custom domains.
Billing for the custom domain add-on must match your billing for Notion — if you pay for Notion annually, you’ll also be billed annually for the custom domain. If you pay for Notion monthly, you’ll also be billed monthly for the custom domain.
If you add a custom domain to your existing paid plan, you’ll pay a prorated amount for the remaining time left on your current billing cycle. On your next billing date, the custom domain add-on charge will be added to your regular billing cadence.
To connect a custom domain with Notion Sites:
Go to
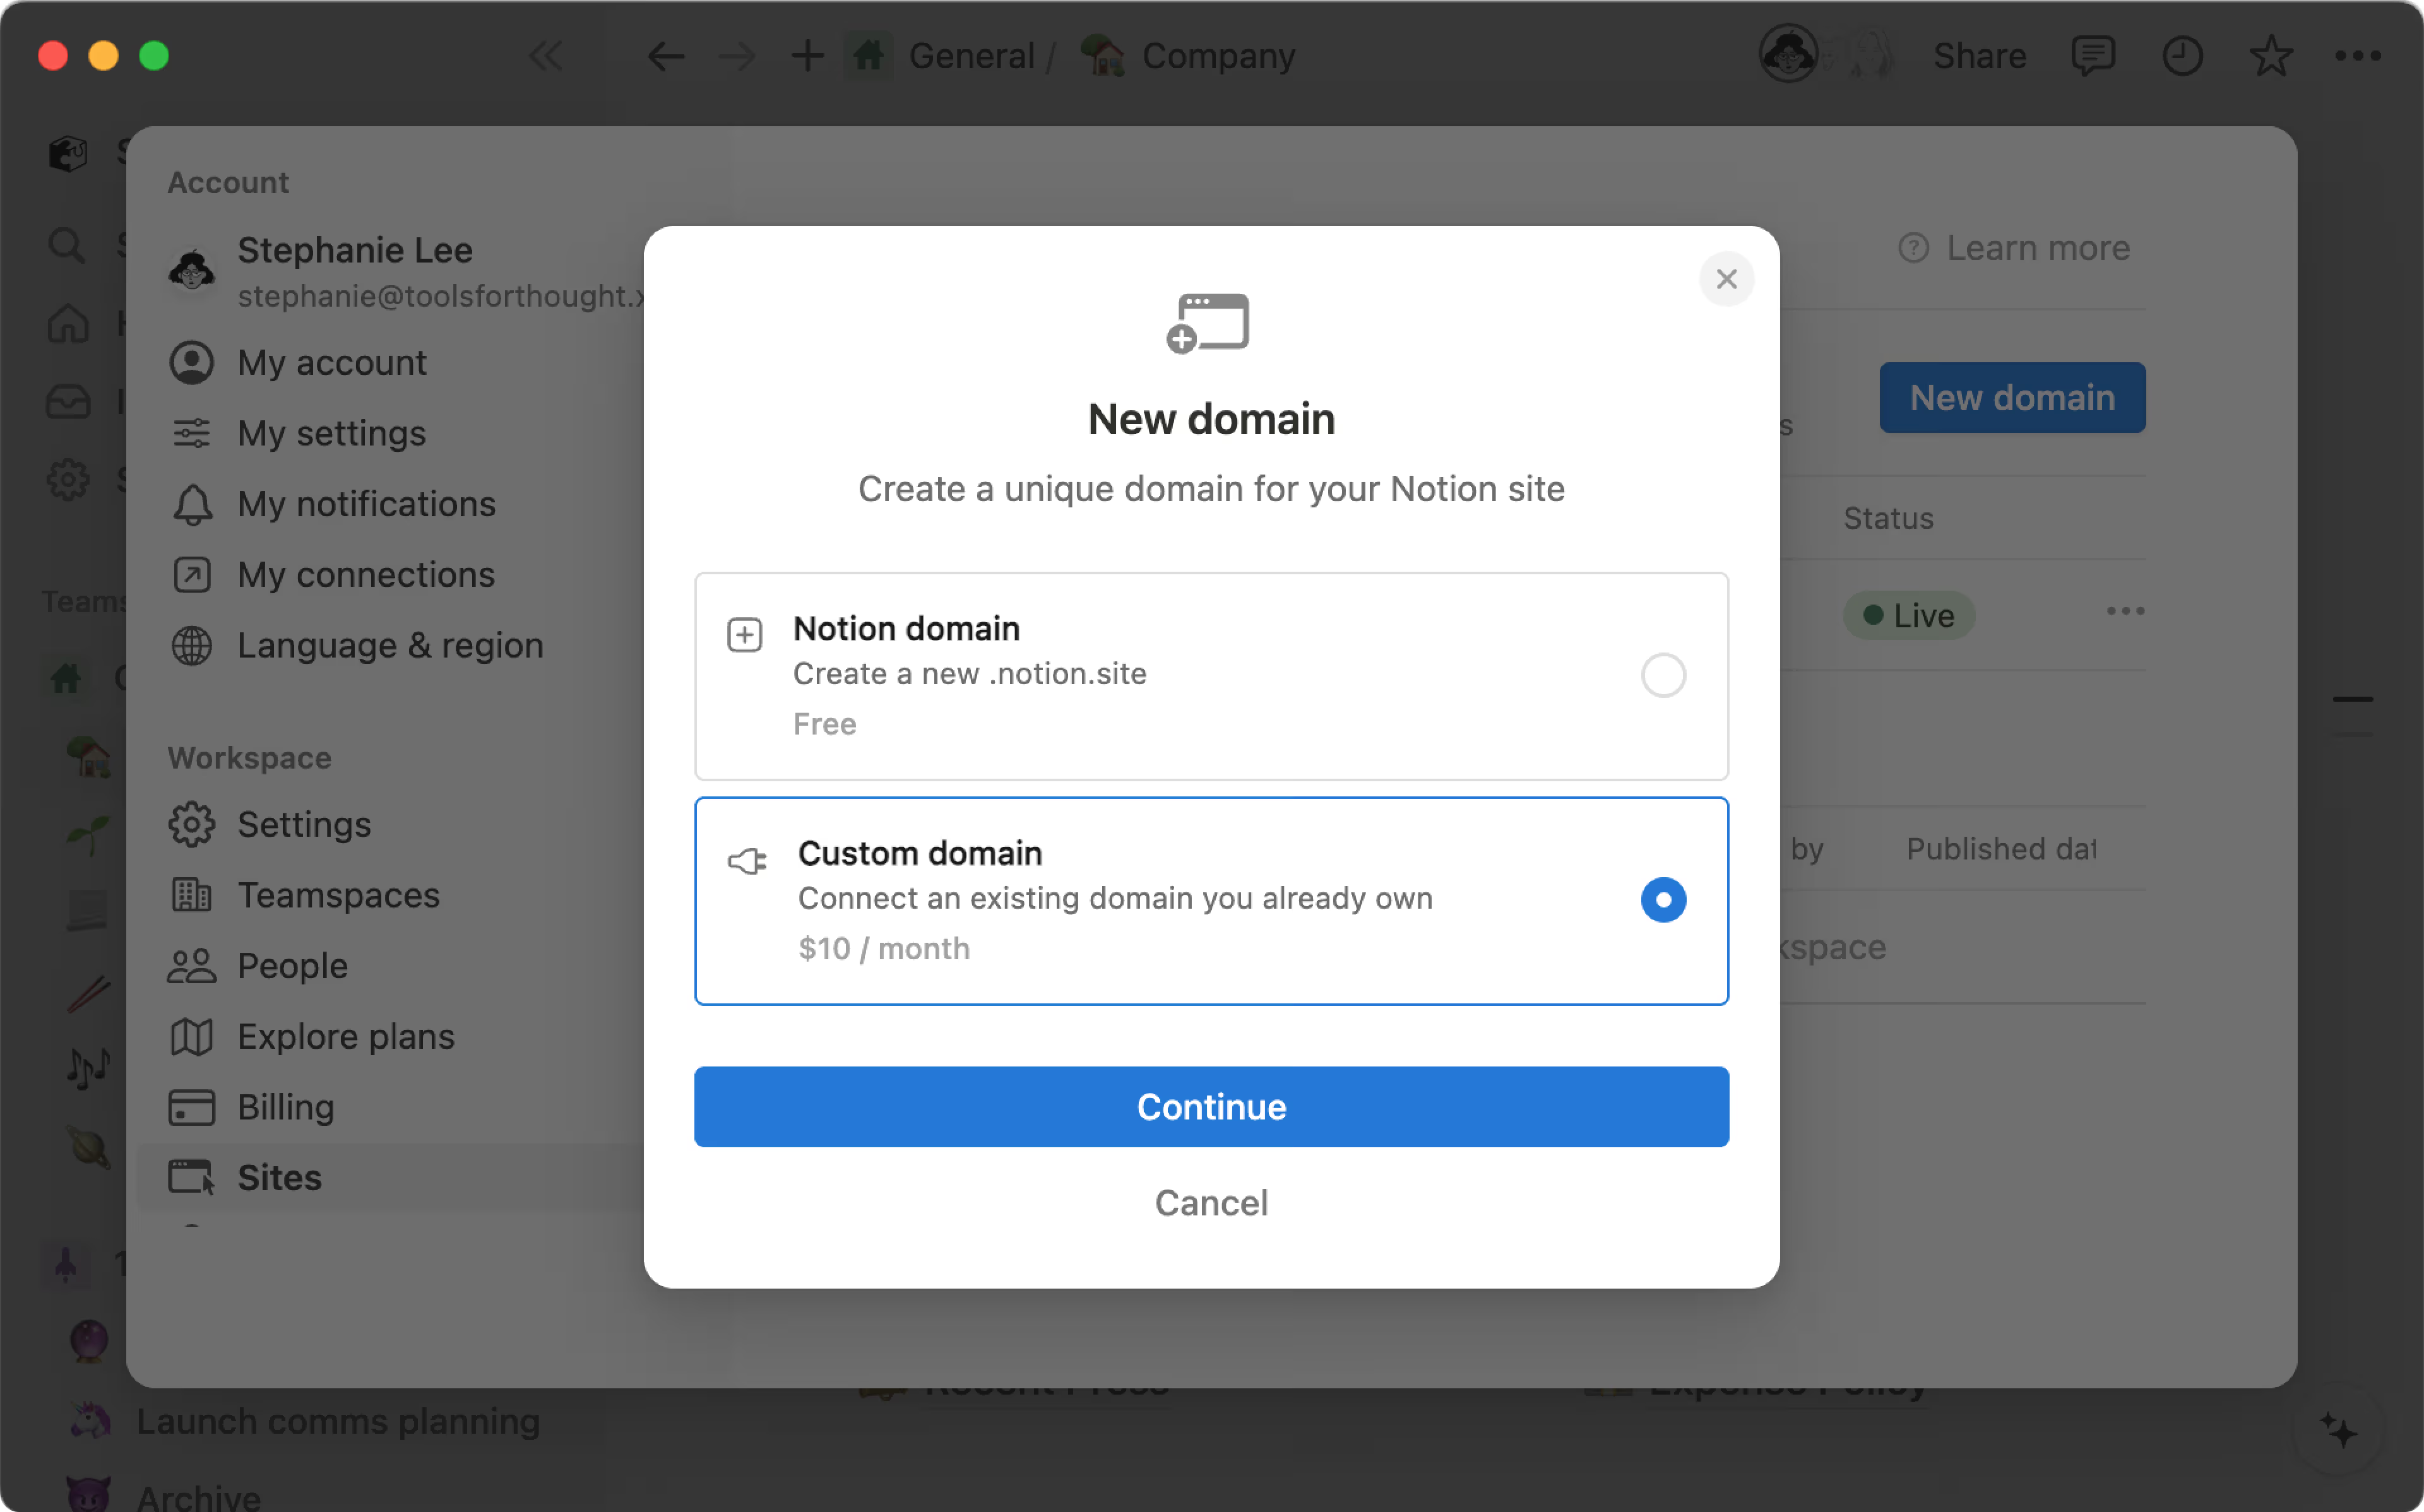
Settingsin your sidebar →Sites.Next to
Domains, selectNew domain.Select
Custom domain→Continue. You’ll be prompted to set up a payment method for this add-on if you don’t already have one on file.Enter your custom domain →
Continue.
There are a few important rules to follow when adding your domain to ensure a smooth setup:
You must already have purchased your domain from a DNS provider.
When entering your domain, you must include a subdomain. This is typically
www, but any other subdomain works too (ex.:careers.my-domain.comorportfolio.my-domain.com).
If you want your root domain to point to your Notion Site, we recommend setting up your subdomain to
wwwand setting up a redirect with your DNS provider. Here are some instructions from common providers for how to set this up:You’ll be prompted to go to your DNS provider and add a CNAME record for the domain you want to connect. Set the CNAME target to
external.notion.site.. Note the period at the end of the CNAME target!
Learn more about domains
Next, add a TXT record for the domain. You can copy the record name and value for easy use.
Select
Verify.
Once you add a custom domain, you’ll see it and its status in your list of domains.
When you use a custom domain with Notion Sites, you’ll also have the option to remove any Notion branding for that custom domain. Learn more about customizing your Sites in this article →
Go to
Settingsin your sidebar →Sites.Next to your desired domain, select
•••.From here, select
Deleteto remove your domain. If any Notion Sites have been published to the domain you’re trying to delete, you’ll be asked to unpublish those Sites before proceeding.

Note: When you delete a custom domain, you'll still be able to use it with Notion Sites until the end of your current billing cycle. After that time, you will no longer be charged for that custom domain.
In the setup below, the name of the TXT record is set to notes but should instead be _notion-dcv.notes. The value of the record is set to _notion-dcv.notes but should instead be the unique TXT record code provided in Notion when you’re setting up the custom domain.

In the setup below, the CNAME host is set to external.notion.site but should instead be set to your desired subdomain, like careers.my-domain.com. The CNAME value is correctly set to external.notion.site.

Below are instructions for setting up your CNAME and TXT records with some of the most common DNS providers.

Note:
The screenshots used below are just examples. Make sure you use your specific values as you follow the steps!
For more help setting up, please reach out to your DNS provider.
GoDaddy
Find your domain and select
Manage DNS.
Add the CNAME and TXT DNS record. In this example, because we’re setting up the subdomain
www.my-domain.com, the CNAME will be set towww. Make sure to adjust accordingly depending on your chosen subdomain.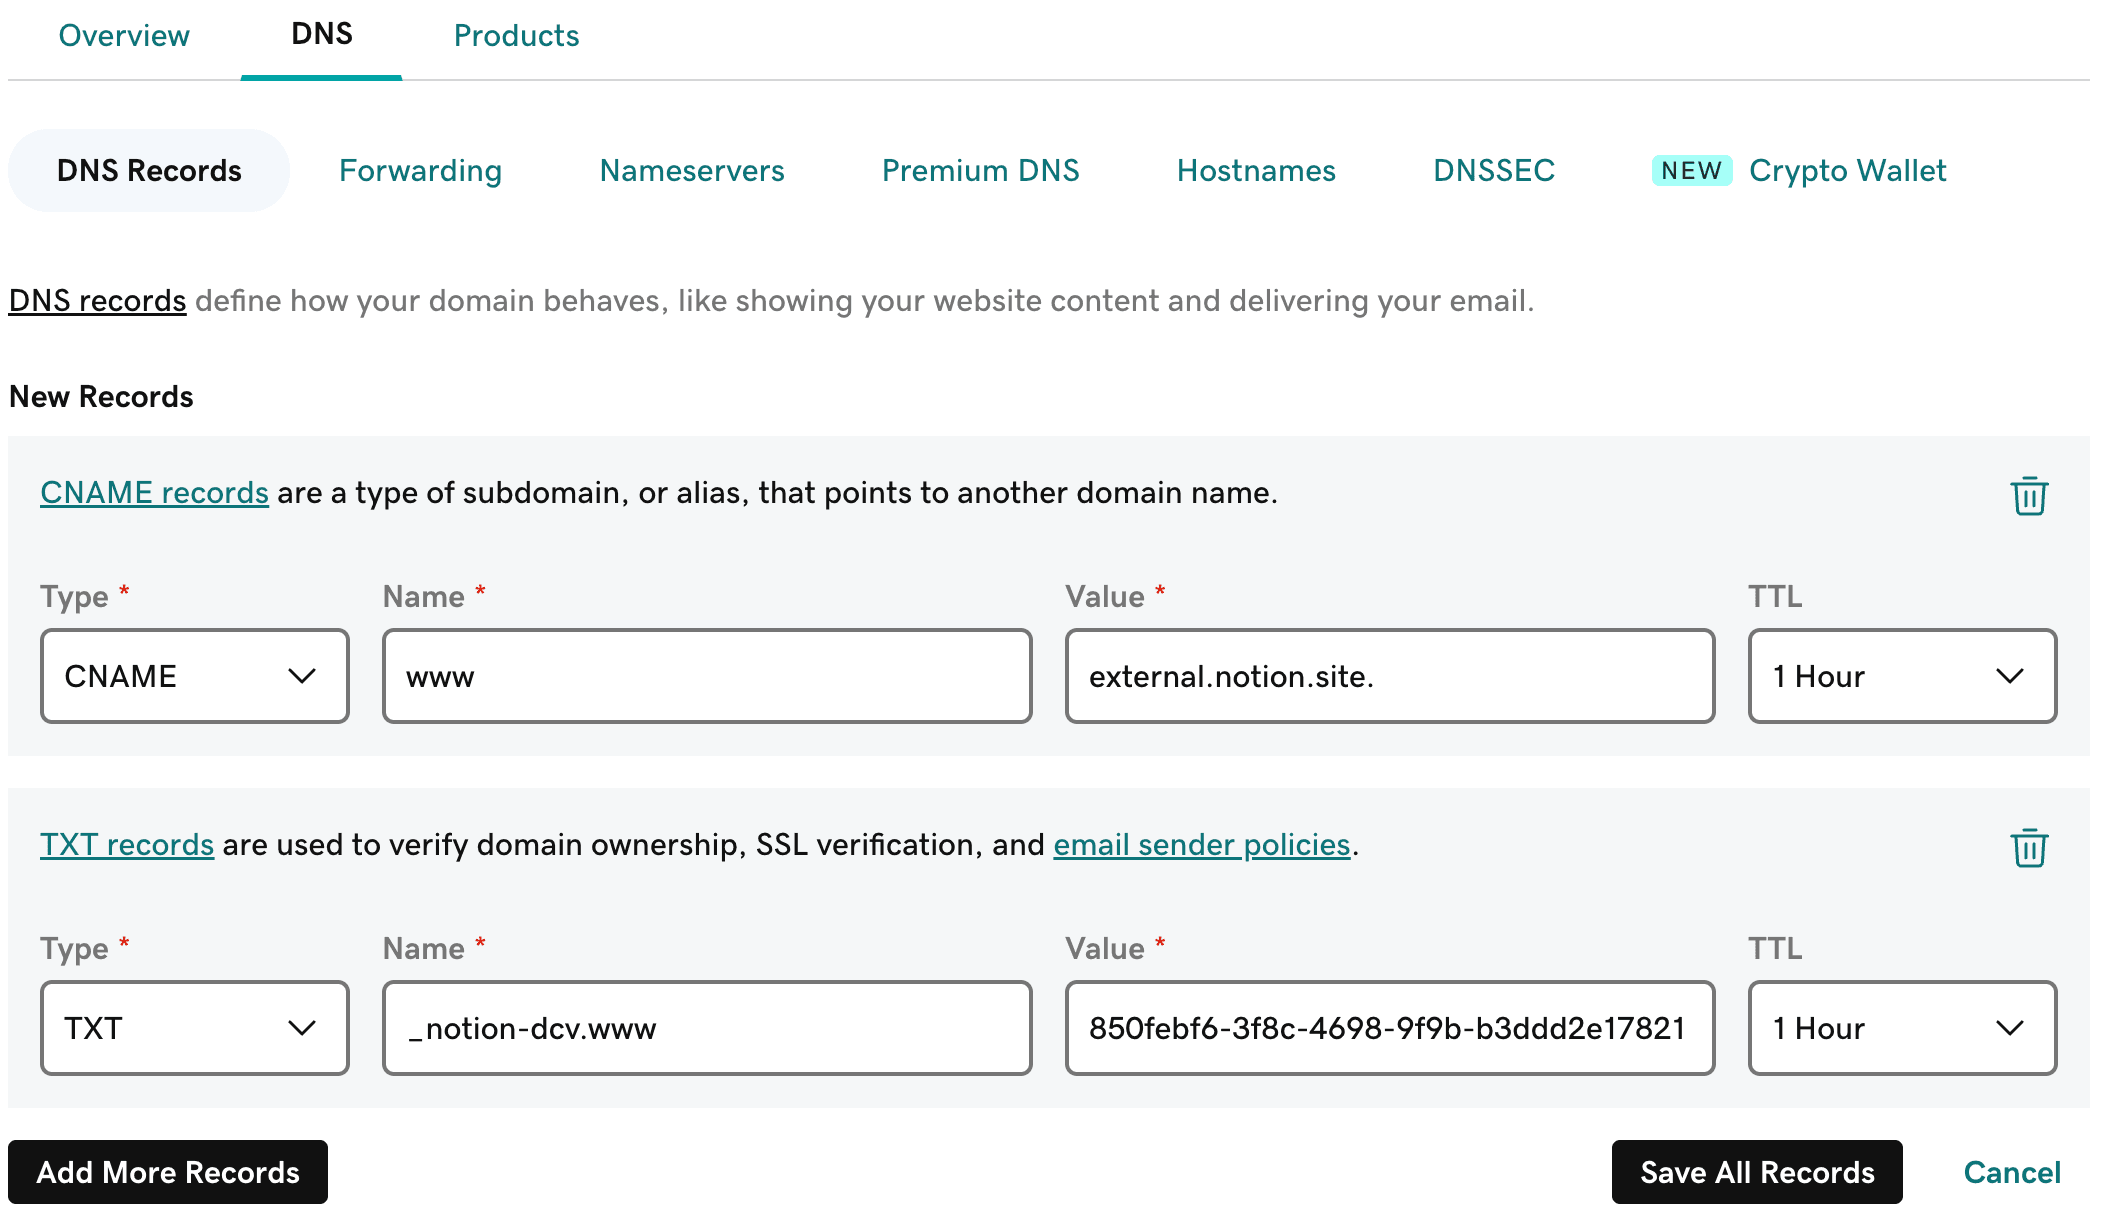
Select
Save All Records.Confirm the two records have been successfully added.

Namecheap
Go to your domain list and find the domain you want to set up with Notion.
Open the
Advanced DNStab.
Add the CNAME and TXT DNS record. In this example, because we’re setting up the subdomain
www.my-domain.com, the CNAME will be set towww. Make sure to adjust accordingly depending on your chosen subdomain.Select
SAVE ALL CHANGES.Confirm the two records have been successfully added.
Squarespace
Open the
Domainstab and select the domain you want to set up with Notion.Open the
DNS Settingstab.Add the CNAME and TXT DNS record. In this example, because we’re setting up the subdomain
www.my-domain.com, the CNAME will be set towww. Make sure to adjust accordingly depending on your chosen subdomain.
Save your changes.
Confirm the two records have been successfully added.

Cloudflare
Find
Websitesand select the domain you want to set up with Notion.Using the left navigation menu, select
DNS→Records.Add the CNAME and TXT DNS record. In this example, because we’re setting up the subdomain
www.my-domain.com, the CNAME will be set towww. Make sure to adjust accordingly depending on your chosen subdomain.Make sure
Proxy statusis toggled off.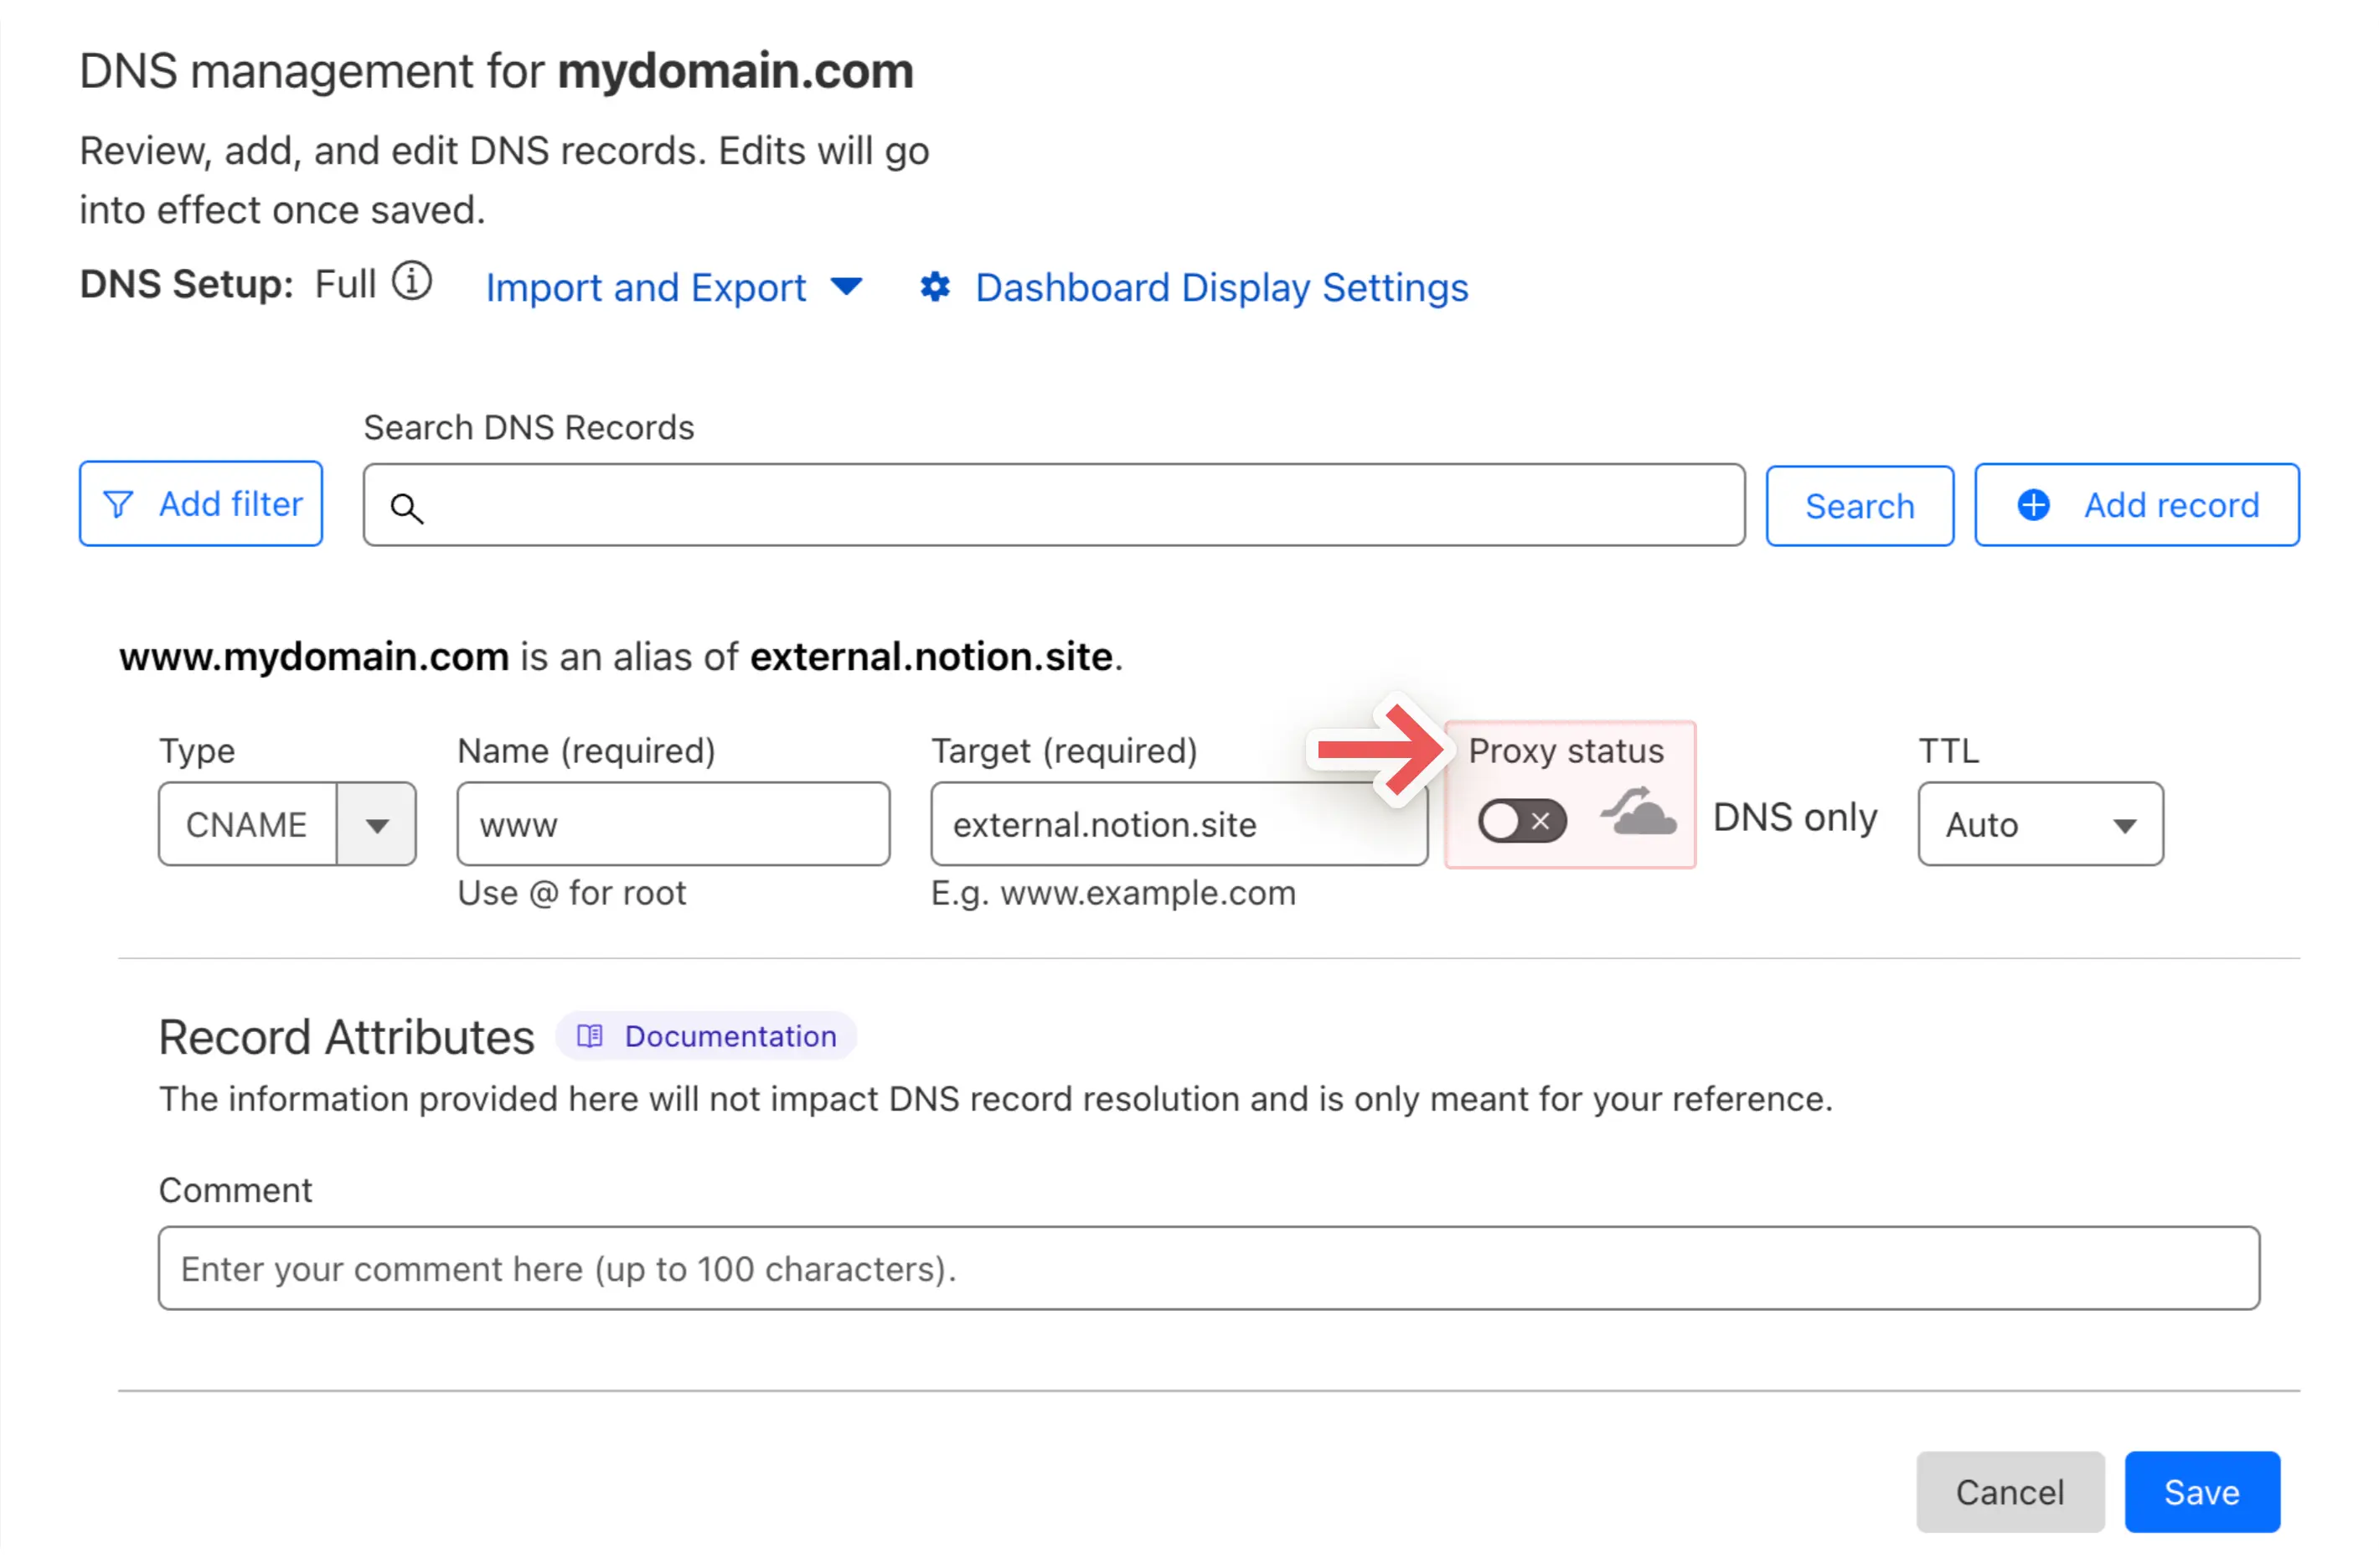
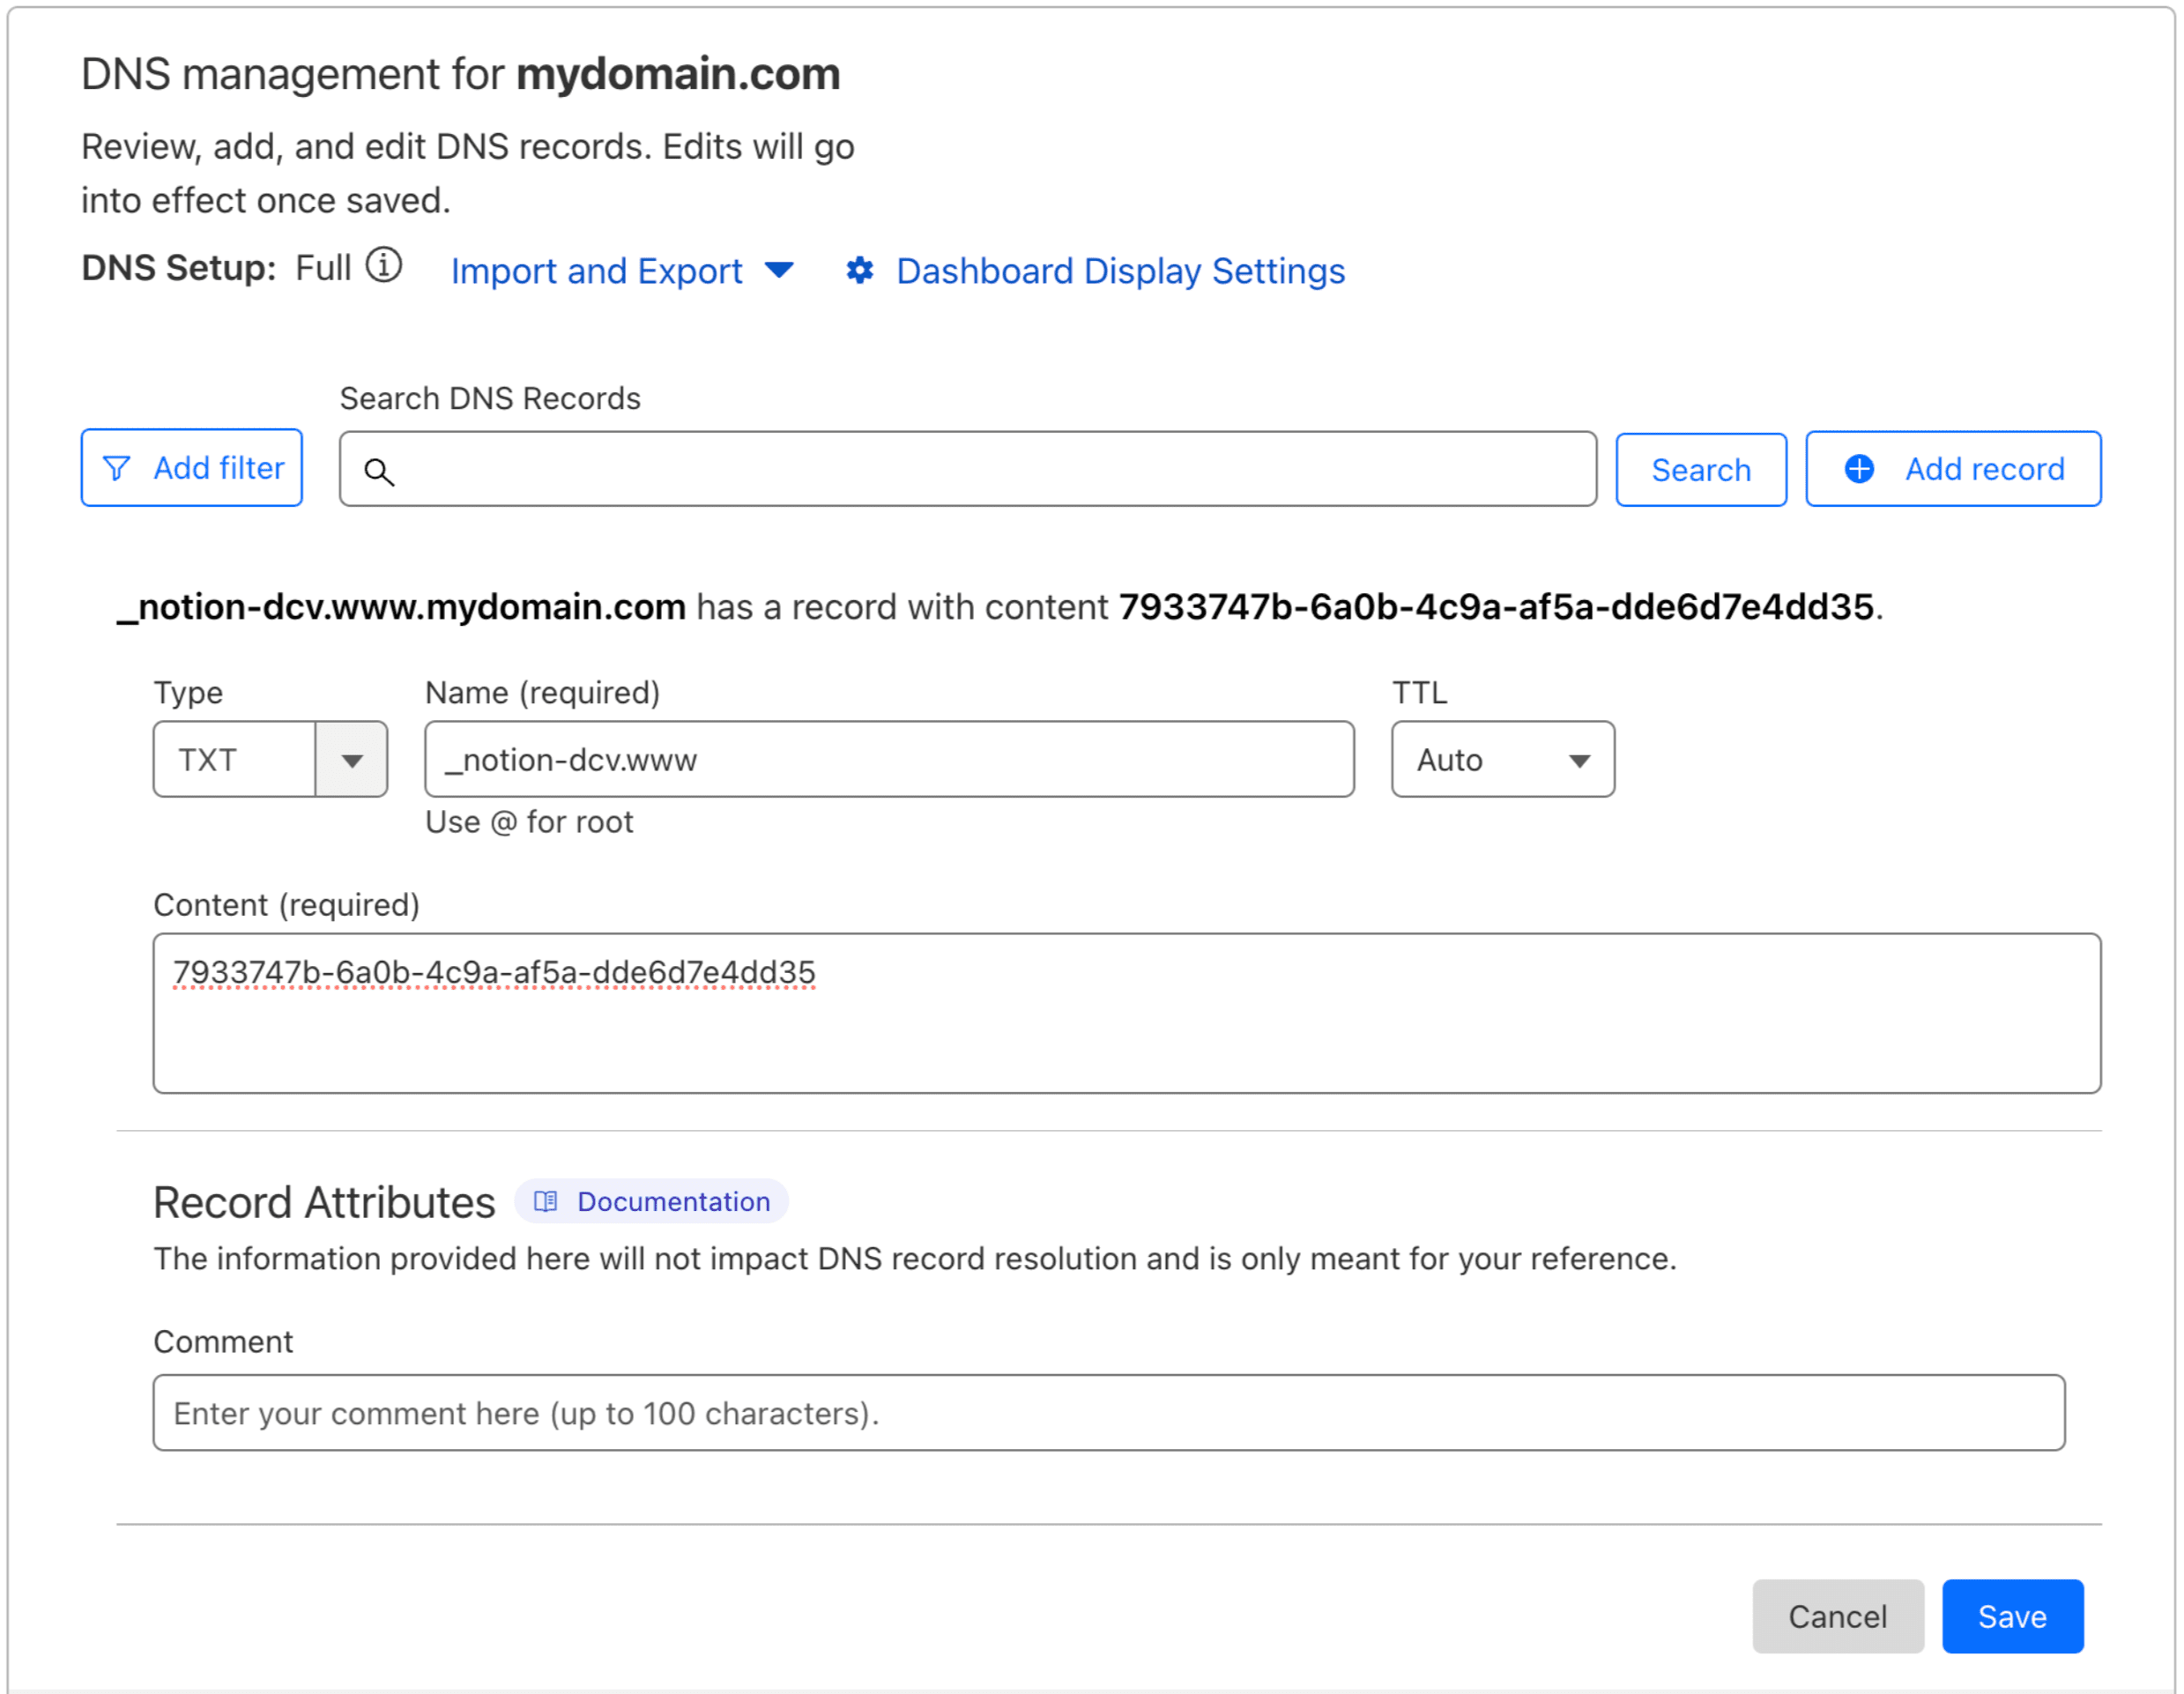
Add the TXT record.
123-reg
Find
My Productsand select the domain you want to set up with Notion.Open the
DNS Recordstab.Add the CNAME and TXT DNS record. In this example, because we’re setting up the subdomain
www.my-domain.co.uk, the CNAME will be set towww. Make sure to adjust accordingly depending on your chosen subdomain.
Select
Save.Add the TXT record.

Select
Save.If you would like to set up your top-level domain (in this case,
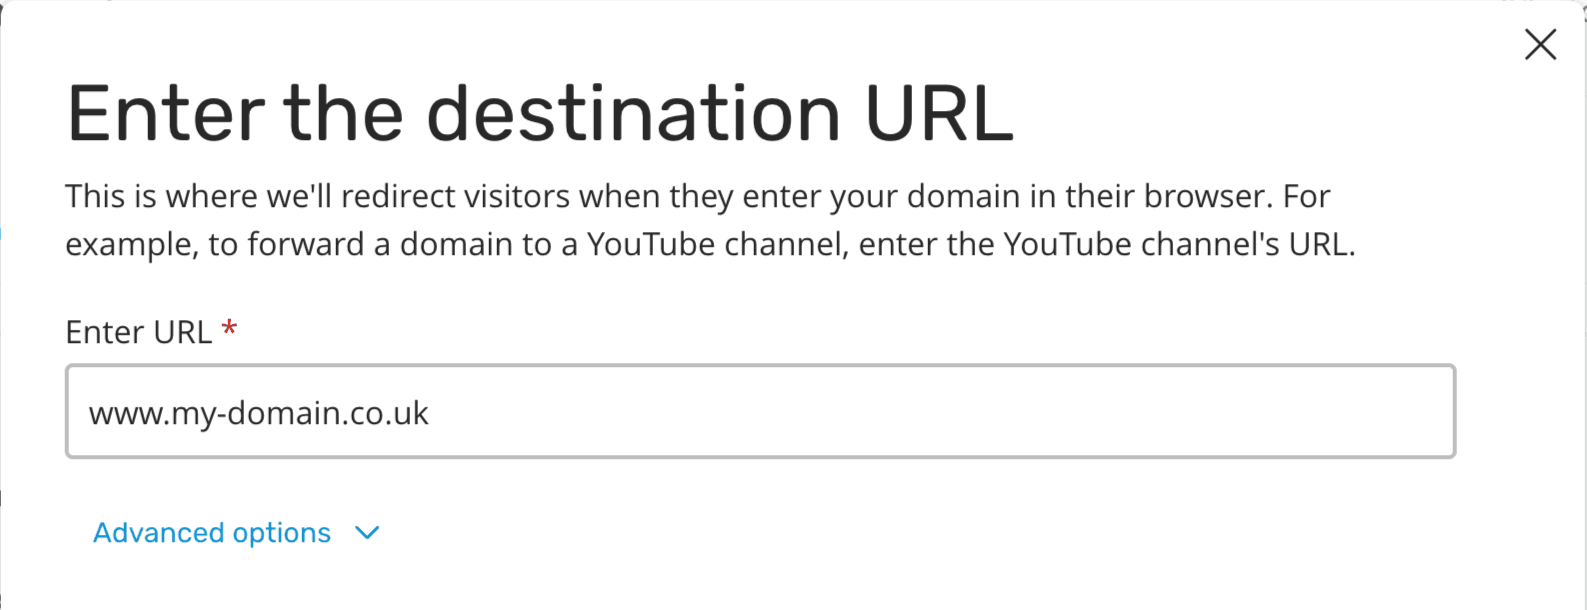
my-domain.co.uk) to redirect to the domain you have set up with Notion (www.my-domain.co.uk), open theForwardingtab. Then, selectSet upand enter your domain.

Note: Your DNS records might display a period at the end of your subdomain. While in general this shouldn’t impact your setup, you can try removing this if you’re having issues connecting your custom domain with Notion Sites.
